
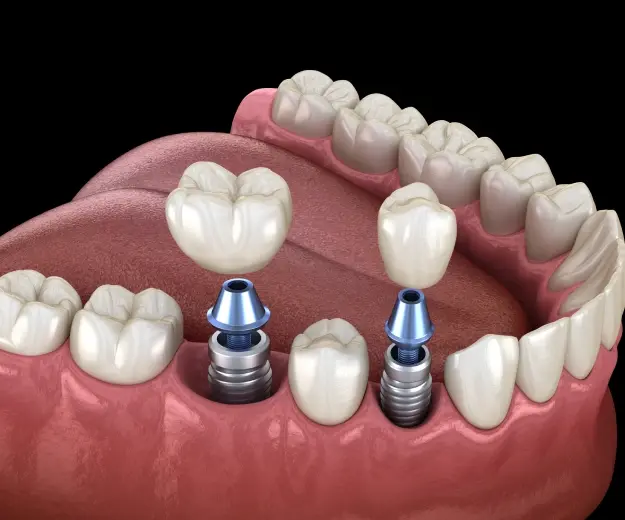
What Are Dental Implants?
Dental implants are the only truly comprehensive solution to tooth loss. No matter how many teeth are missing, a dental implant gives you back the entire tooth structure – from the supportive root hidden beneath the gums to the visible crown.
Dental implants offer a better tooth replacement than any other method currently available. They are surgically placed and, over the course of four to six months, promote the growth of bone tissue to gradually bond together with your jawbone. Once this process, known as osseointegration, is complete, the dental implants provide a sturdy foundation for the crown, bridge, or denture that is affixed on top.
Schedule an Implant Consultation

Why Choose Dr. John E. Russo, DMD, for Dental Implants in Orlando?
Dental implant treatment requires a higher level of surgical skill, precision planning, and restorative expertise than almost any other procedure in dentistry. Dr. Russo has been placing and restoring implants for Orlando patients for decades, combining advanced technology with a meticulous, patient-first approach that delivers results built to last a lifetime.
Complete Implant Care, All in One Place
From consultation to final restoration, your entire dental implant treatment is completed in our Orlando office—no outside referrals. This ensures seamless care, clear communication, and a more comfortable experience from start to finish.
Precise, Computer-Guided Placement
Using advanced computer-guided technology, Dr. Russo plans each implant with exceptional accuracy, improving safety, efficiency, and long-term success.
25+ Years of Experience You Can Trust
With advanced training and decades of hands-on experience, Dr. Russo delivers expert, reliable implant care for lasting results.
Who Dental Implants Can Help
What to Expect During the Dental Implant Process at Our Orlando Office
When you visit Dr. Russo for dental implants, the process will take place over the course of two phases. During the first phase, our team will examine your mouth to determine whether you’re a good candidate for dental implants and draw up a treatment plan and timeline for you so that you know what to expect. Our team is able to complete the entire process in the office, so you won’t have to worry about traveling between separate specialists. The next phase of the process will be restoring your mouth by attaching your bridge, crown, or denture to your implant.
Phase 1:
The first phase of the dental implant treatment is the preparation and placement of each implant post. This part usually takes place over the course of a month or so. The steps involved in Phase 1 of dental implants include:
- Consultation
During this initial appointment, you and Dr. Russo will discuss your treatment plan and what you can expect with dental implants - Exam
During an examination, Dr. Russo will put together your treatment plan. By thoroughly examining your gums, surrounding natural teeth, and your unique facial features/structure, our dentist can achieve a tooth replacement that looks, fits, and feels just like it should. - Procedure
Using advanced technology (more on that below) and according to the treatment plan already set in place, our dentist will carefully place the dental implant posts beneath the gum line. - Recovery
Over the course of several months, the dental implant posts will encourage the growth of bone tissue and gradually fuse with the jawbone. Once this process of osseointegration is complete, Phase 2 can begin.
Advanced 3D Imaging for Precise Implant Placement
At our office, we use the CareStream 8100 3D to enhance the accuracy and success of your dental implant treatment. This advanced imaging technology provides high-resolution, three-dimensional views of your jaw, allowing our dentist to plan and place implants with exceptional precision.
By guiding implant placement in real time, this system helps ensure optimal positioning, improved stability, and long-term success. The result is a safer, more efficient procedure and a strong, secure foundation for your new smile.
Advanced Dental Implant Procedures
Dental implants have a long-term success rate of over 95%, and part of that success relies on having a healthy jawbone to provide implants with the strength and support they need. Since the jaw becomes thinner and weaker over time when the teeth are lost (or maybe naturally thinner in certain areas), Dr. Russo may recommend preliminary treatment such as a bone graft or sinus lift to prepare the jaw for a dental implant procedure. Learn more about these advanced treatments and how they’re used to lay the foundation for long-term dental implant success.
Bone Grafting
A bone graft can be a great option for people whose jawbone is thin or weak as a result of gum disease (which destroys the bone over time) or who lost their teeth a long time ago and have experienced the natural bone loss that occurs when the teeth are lost.
The procedure typically takes between 45 and 90 minutes and involves placing bone grafting material or bone tissue from another area of your body into the area of the jaw where the implant will be. This encourages your body to rebuild more of its own bone so that it can provide the solid, stable foundation dental implants need.
While the initial recovery period is around seven to ten days, it often takes between three and six months for the jaw to build enough bone for the implant procedure to be done. However, in some cases, the bone graft and implant procedure can be done at the same time
Sinus Lift
A sinus lift is only done when dental implants will be placed in the upper jaw, which is naturally thinner, has less bone density, and is also very close to the sinuses. To give the upper jaw enough “height” to support the length of an implant post, a sinus lift raises your sinuses and adds additional bone tissue into the area. Similar to a bone graft, this procedure also encourages the body’s own bone growth, so it will take some time (generally between three and nine months) before you’re ready to have implants placed in your jaw.
While these preliminary treatments add time to your treatment plan, they also enable you to enjoy a healthy, restored smile for a lifetime, so the payoff is well worth it!
Benefits of Dental Implants
Because they offer a comprehensive solution to tooth loss, dental implants offer a wealth of benefits for patients who are missing teeth. Some of the most significant advantages of this tooth replacement method include:
Oral Benefits:
- Improve the Function of Your Teeth
For patients missing a larger number of teeth, an implant-supported partial or full denture may be recommended. Traditional, removable dentures only restore between 5% and 20% of healthy chewing function. Implant-supported dentures restore about 70% of chewing function. This means that patients can chew a wider range of foods and maintain a more nutritious diet.
- Natural Look, Feel & Function
Once in place, your implant-supported tooth or teeth will look, feel, and function just like your natural smile. Because the implant posts mimic the root structures of lost teeth, your newly restored smile will look and feel just like your healthy, natural dental structures.
- Easy Oral Hygiene
Because implant-supported restorations are fixed, you can easily brush them just like your natural teeth. Be sure to brush at least two minutes at a time twice a day. To keep your implant-supported replacement teeth looking and feeling great for years to come, consider brushing between meals as well as in the morning and before bed. You may also need to change to a specialized flossing tool if you have a larger partial or full denture. This will allow you to remove plaque and bacteria that can accumulate between the denture base and the gum tissue. We may also recommend that you receive more frequent dental checkups and professional teeth cleanings for the first few years following dental implant tooth replacement. This is especially important for patients who have struggled with gum disease.
Maintaining & Caring for Your Dental Implants
What do you need to do to perform proper dental implant care in Orlando? The answer is almost nothing you wouldn’t already do for regular dental care! Dental implants don’t require any tricks to clean them or any maintenance that requires specialized products; you can keep your new teeth safe by continuing to take the same proactive approach that you employ to protect your natural teeth.

Make Oral Hygiene a Priority
An implant can’t get cavities, but the tissues anchoring it in place can still be damaged or destroyed by gum disease. Keeping your gums healthy will help prevent oral health issues that could ultimately lead to implant failure. Simply brush and floss at least two times every day to keep your implants and the area around them clean of food and harmful bacteria. Be thorough with your brushing; each session should last at least two minutes, and you should pay close attention to the space between the implant restorations and the gums.
Eat a Healthy Diet
Having an occasional sweet treat will not put your dental implants at risk. Consuming too much sugar and starch, however, can easily lead to gum disease, which in turn will cause serious issues for your implants. Make sure that you’re eating candy, chips, and sweets in moderation in order to keep all of your teeth as safe as possible. Fruits, vegetables, dairy products, and lean proteins tend to improve your oral health; in particular, foods that contain calcium and vitamin C will directly contribute to an environment that’s ideal for implants.
Break Bad Habits
As strong as dental implants are, they can still be broken or worn down. Avoid using your implants to bite your nails or chew on pen tips, and stay away from extremely hard foods (such as ice and hard candy) that could cause damage if you bite down on them. Do not tear open packages with your teeth; find an actual tool to do the job. If you’re a smoker, quit as soon as you can to keep your risk of developing gum disease to a minimum.
Protect Your Dental Implants
Do you have a tendency to grind your teeth when stressed? You can consciously avoid doing so during the day, but at night you’ll need to wear a personalized nightguard. This will protect your dental implants (and your natural teeth) from the damage that frequent grinding can cause. You should also get a mouthguard to wear while participating in any athletic activity as a safety precaution.
Schedule Regular Dental Checkups
During your routine checkups, we will examine your implants along with your natural teeth. This allows us to confirm that no problems are developing. If any potential issues are found, we’ll inform you immediately and let you know what steps you can take to avoid a bigger problem later on.
Our Smile Transformations
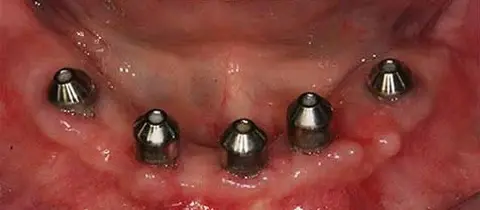
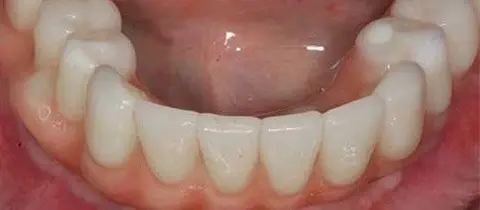
Implants placed by Dr. Russo and restored with an implant supported bridge
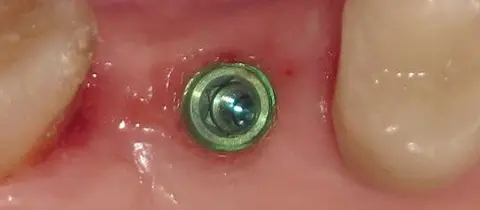
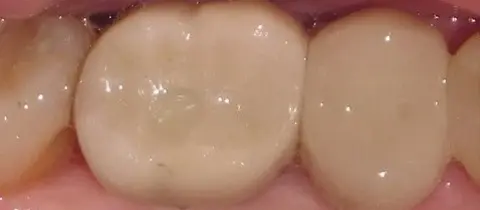
Implants were placed by Dr. Russo and restored with an implant-supported bridge. This is a maxillary (upper) case and is combined with veneers.